Tuesday, February 28, 2017

OMG for February ... and some superheroes ;)

My OMG goal for February was to finish this simple Sponge Bob quilt.  Alas, I didn't even come close - all I did was finish stitching together the blocks, which, if I'm honest, only took about an hour :D  I'll try to get it finished next month :)  Since I'm not adding borders and will be doing a simple birthing to finish it, it really shouldn't take very long once I get started :D  I'll post my progress to the February finish link-up, here :)

I got a birthday gift finished this month, for a great nephew who turned 9 a few days ago :)  I made this for him:

Ruffleless Ruffle Duffle :D

It's another Ruffle Duffle, but my version, for obvious reasons, is ruffleless (as was my first attempt at this project :D) :)  I think all of my Ruffle Duffles will be ruffleless - I'm not all that fond of The Ruffle, but I do like the bag, and I hope the recipient likes it too :)  The superhero fabric, BTW, is from a Joanns run last year :D  NAYY, of course!


Wednesday, February 22, 2017

La Grenouille ... or ... les grenouille? :)

 I have some bags of "sets" of scraps and pieces that go together - lots of them have been hanging around for a while, so I've been working on using them up, one bag at a time :D  This round was a collection of frog scraps/prints, which I paired with denim kids jeans from the thrift store (sale was $1/pair - a most excellent sale, to be sure!).  I got the last of the bags finished yesterday, and got some pictures outside today :)

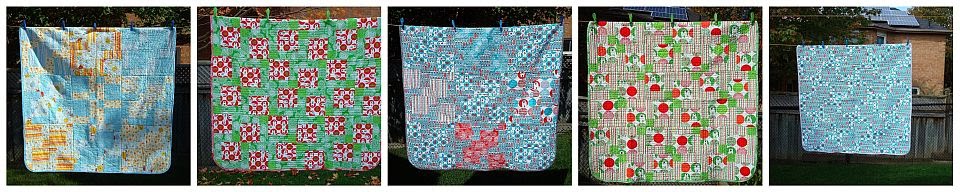
Here are all 16 bags on my clothesline ...


and here they are tucked into a drawstring bag for "presentation" to the counselling center (all the bags are being donated).  I appliqued a batik frog onto muslin, and sized the bag fit all 15 zippies :D  Notice her beaded eyes - I think she's very cute :)  (free pattern here)


Here's the bag filled and tied ...


... a close-up of the applique - if you look closely you can see her lil topstitched mouth :)


I did 9 regular zipper bags, here ...


and here ...


and finally, here :)


They're all embellished a bit on the back with decorative stitching and cotton tags randomly chosen from stash, and stitched down :D


Last, but not least, the 7 earbud pouches :)


This concludes our visit with La Grenouille :D  Next up will be a visit with Ruffleless Duffle Bag #2 ... a Superhero version ... coming soon to a movie theater computer screen near you!  :)


Sunday, February 12, 2017

I tried something new ... and duffle-y :)


I tried a new to me tutorial this week - while it's made from the tutorial for a Ruffle Duffle, mine is, as you can see, ruffle-less.  I modeled mine after this one that I found on Pinterest.  Hers does have ruffles, but it's more structured and streamlined than the original Ruffle Duffle, and the quilting is rather a star in her show :)  It's exactly what I wanted mine to look like, and I think I came pretty close!  Mine measures 13.5" wide X 7.5" tall x 8.5" deep - definitely bigger than a boxy :D

My favourite aspect of the Ruffle Duffle is the fact that it's made like a boxy bag, only larger, and with straps.  Most duffle bags, including the Cargo Duffle from Anna/Noodlehead, are made with a side pieces with a zippered gusset, or they're the kind with round ends.  I like making boxy bags, and have made many of them, so when I realized that the R.D. is made in a similar manner, I knew I would give it a whirl.  The size (much larger than any boxy I've made) was difficult to maneuver through my machine to quilt and to stitch.  It was hard to move a bulky firm piece of fabric around - mine is made with outer + batting + mid-weight interfacing + lining, so it got pretty awkward :)  Not undoable - just a bit difficultly doable ;)

While quilting sandwiches of those 4 layers - one for the front, one for the back, I didn't think to spray baste - I figured that once I got the first row of quilting done, the pieces would stay in place.  NOT SO.  They shifted, and I didn't notice until I had done the 4th row of quilting - the layers skewed by several inches, LOL.   Lesson learned :D


Two things I will change next time - I used 6" pieces of webbing for the tabs, when the instructions called for 3" tabs, HAHA *brain fart #1*  Mine are awkwardly long :)   Secondly, I won't forget to bind the bottom middle seam like I did on this bag *brain fart #2* - you can see it in the picture where someone with old hands broke into my sewing dungeon to hold the bag open :D  Tomorrow I'll make a fabric covered plastic canvas base for the bag - that'll give the bottom some extra stability, and cover my bewbew ;)

I love this bag, and I love the tutorial, and I already have a 2nd R.D. planned for a birthday coming later this month.  I showed this one to my husband and told him I was making one for ****** for his birthday - he got very quiet and said ... "But you'll use different fabric, right?", LOL.  Dennis, I promise I won't make it in pink for a young man who is soon to turn 9!!

Here are a few more photos I took during construction - when I realized that things were going quite well for me, I decided to document the progress a bit :D

The lining side of the bag during zipper install.


Apparently I thought the lining during construction, was very photograph-worthy!  ;)


OOH!  Finished bag - viewed from the side to show off it's lovely large boxy shape!


This side view shows off the pocket (there's one on both sides) and the kitty zipper pull I found in stash :D


Hello Kitty ribbon used to embellish the pockets :)


A close-up of the kitty zipper pull - notice the fish hanging from the bottom, hehe.


Posting to Celtic Thistle Stitches New to Me for February :)

Wednesday, February 8, 2017

... and this is how my sewing day started :D

My day :D

As I usually do, I opened a can of Diet Dr. Pepper and came down to the sewing dungeon to do some housework sewing.  I set the can down on my sewing table, turned on the iron, then grabbed the FULL can, which promptly and without fanfare, slipped right out of my hand, and fell to the floor.  It made quite a splash, I can assure you :D  I got pop on my pants, and my slippers, and my sewing chair ... and even a little bit on the wall behind the chair, hehe.  Of course - the remaining pop in the can, instantly lost all fizz due to the hit it took from the floor, so it tastes like crap.  Thankfully it didn't hit my sewing table/machine/current project, plus I have more pop, so the day won't be a total loss - #firstworldproblems >:D


For a bit of pampering ...

A few days ago I mentioned that my cupcake Retreat bag would be making a repeat appearance - and here it is :)  I had some extra toiletries from Christmas (due to a boyfriend/girlfriend break-up in the family, boohoo) - the Bare Foot cream and the Moisture Gel socks are from my sister, and the Eos and "Keep Calm and Kiss" lipsticks and the face mask, are from me.   When I finished the cupcake Retreat I knew it was the perfect bag to hold these toiletries, to be donated to a local shelter. I hope that someone who is in a crappy situation, will be somewhat cheered up to receive this.  To whomever it ultimately ends up with, my sister and I both send you hugs!

Tuesday, February 7, 2017

Doin' it in 3D :D

So far February has been a very productive sewing month for me!  It's cold outside, so I've been hunkering down in my sewing dungeon, busting stash.  There's no discernable evidence that I've actually busted ANY stash, but I know I have ... and my OneNote list of completions for the month, supports my assertion :D   I put my finishes in a Rubbermaid container to keep them fresh and dust free until I'm ready to get pictures - I noticed this morning that 3 of the bags were taking up more space than the rest, so I thought I'd get them donated sooner, rather than later ;)

Presenting ... "Bags in 3D - a Compilation by Sandra" - doesn't that sound fancy? LOL!   I'm literally sitting at the computer in the dungeon, wearing flannel sleep pants, a ratty t-shirt and my poop emoji slippers.  Fancy indeed!

Up first - my cupcake Retreat bag - the fabric is a stock item @ Hobby Lobby - I love this print :)  I like making Retreat bags, but I like them better without the special frame (even though I bought 10 frames because they're cool!).  This bag will be making a repeat appearance in a day or two for a special reason - stay tuned ;)  OH!  Note the sweet cake zipper pull - isn't that adorable!

Regular boxy bag, made to use up the last bits of this pretty fox fabric.  This is the "large" size that I make - the fabric is pieced/quilted, then trimmed to 14"w x 16"t.  I can't remember how big I cut the boxed corners - probably 1.25 or 1.5" from the seam allowance.  I add a handle for carrying it, and prairie point tabs on either end of the zipper, to make it easier to open and close the zip :)  Note the cute fox zipper pull :D

One more Retreat bag (free pattern linked above) - made to use up the last of this monkey fabric :)  I used rattail and pony beads for the zipper pull - perfect for a fun/informal bag :)  My Retreats finish to about 12.5"w x 7"t x 4"d :)
And there you have it - some 3D finishes that worked out quite nicely, and which are all being donated :)  Amanda - I'll bring these to our next aquafit class ;)

Monday, February 6, 2017

OMG for February :)

I didn't get a project uploaded to OMG for January, but I'm ready for it this month :D  I pulled out a bag of 6.5" squares that I cut out years ago, with the intention of finishing a quick baby quilt.  At this point, quick is out of the question for obvious reasons, but at least I can work on the finishing part! It's just a little thing - 6 rows of 6 squares, so it'll finish to about 36" x 36".  I don't even have a single scrap or piece of leftover fabric in either print, to make a matching bib - I must have used everything else at a previous time.  Regardless, I'm sure someone's little muffin will be happy to lay on it and perhaps chew the corners, as little muffins tend to do!

Posting to Elm Street Quilts OMG (One Monthly Goal) challenge + linky - you should check out the other entries - there are a lot of lovely and colourful projects planned, so it'll be fun to see the finishes at the end of the month!  One in particular caught my eye - I had to go to the poster's website to see what the picture actually was, and the story behind it is quite heart-warming!

Thursday, February 2, 2017

Flapping in the breeze :)

Current temperature outside = -6C (21F) ... my Babushkas were in mortal danger while I was outside in slip-on shoes (no socks) and a hoody, trying to get pictures of these pillowcases :D  But the sun was shining and it looked so lovely and crisp outside - I couldn't resist :D

In the last few days I finished off some fabric yardage that had been sitting in stash for quite a while.  I cut out 5 pillowcases, then gave the rest of the fabric to a friend, hoping she could use it (because by that point, I was really tired of that colour and those prints!).  I finished off the last of the cases last night - these will get donated.  5 meters of stash busted - not bad at all :)


5 little pillowcases hanging on the line ... none flew away and all are fine :)


I added lace trim to a couple of them :)

5 pretty pillowcases flapping in the breeze ...


... my toes were frozen so I ran before a sneeze :) 
Pardon the terrible TERRIBLE rhyme - I couldn't think of anything witty off the top of my head!

While I was out there taking pictures I somehow managed, because my fingers were frozen, to change the camera setting to the film setting, and accidentally got a few seconds of video, LOL.  Hopefully I can get this to work ... perhaps I'll be nominated for a video award ... or maybe NOT :D


LinkWithin

Related Posts with Thumbnails