Tuesday, March 31, 2009

A few more March photos (and a rant!)


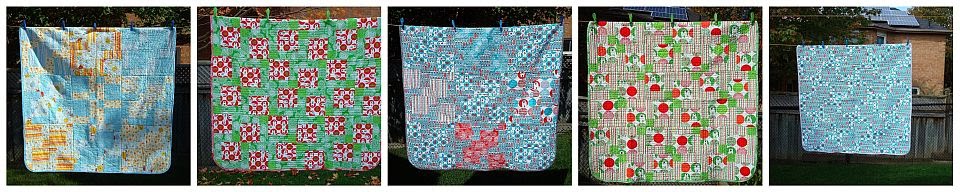
Here are a few more projects I got finished this month - 4 cage quilts, a New England Patriots pillow (to match the quilt I finished earlier) and a last little make-up bag :) I also finished fixing the Cabana Bois row that I screwed up earlier this week - I had to rip the whole row apart and resew it with the proper sashes *rolls eyes*. Tomorrow I have to install a plug cover in my son's room (right Heather? LOL!!!) and work on some hotpads I have cooking away in my craft room :)

I'm also going to make an appointment with a naturopath about my psoriasis - the newest medication I'm taking isn't helping much, I'm tired of my hands and feet hurting, I'm tired of limping, and I'm tired of all these stupid medications NOT WORKING!!! My psoriasis isn't some special case that's different than everybody elses - it's like the drug companies are making these stupid drugs KNOWING they won't work. I've tried over a dozen different drugs and NONE of them work??!!! None of the doctors can give me any suggestions as to what I might be doing to exacerbate the problem - they prescribe new and different medications that - after 2 or 3 or 4 months of use - DON'T DO ANYTHING!!!

I'm hoping that the naturopath can give me some help working on this. As it is I can't give blood now for 2 years because one of the medications I took last year can cause BIRTH DEFECTS if a pregnant lady gets my blood! That is serious medication ... and it DIDN'T EVEN WORK!!!!

Psoriasis SUCKS!!! /end rant!!!!

:)

What do New England Patriots and DUST have in common?

They're both in my son's bedroom, and I had to photograph carefully to avoid as much of the latter as I could :D

Here's the quilt I finished today for DS1 (the 20 year old) - featuring New England Patriots fabric from Walmart in the States - they're his favorite team :) The quilt is 72" X 90", with 9" finished blocks set 8 X 10. The backing is blue flannel, and the binding is the blue print in the alternate blocks. Because my hands are in such bad shape there's no hand sewing in this quilt - the binding was sewn on by machine (that broke my heart, but it had to be done, lol). I did stitch in the ditch quilting in all the seams because the fabric was rather "shreddy" - then I did simple freemo quilting in all the blocks to stabilize the batting so it wouldn't shift. My Husqvarna has a very wide quilting throat, but it kept spitting my needles out today so I had to do the freemo on the Elna. The Elna has a damn TINY throat area - what a pain in the ass to quilt on!! The outer rows were the easiest so they're the nicest - closer to the middle, where the fabric had to be bunched to get it under the needle, the stitches leave a lot to be desired. Oh well - it's done, it looks nice and - IT'S DONE! LOLOL!!!

Monday, March 30, 2009

On a scale of 1 to 10 ...


I rate this project a 14 for cuteness :D

The project is a Boxy Bag - tutorial by Patchyapple. I was using stash fabric to test the project - I didn't use fleece in mine (for stiffness) because I thought it would make the zipper hard to install. I used very thin interfacing - a heavier weight would have worked out better, I think. I may try one with flannel instead of fleece, and the thicker interfacing - I bet that would be just right :)

The project was quite easy to make - the fiddliest part was installing the zipper, and if you use a zipper that's a couple of inches longer than your fabric, that will make it TRES easy to install ;) Mine finished to 11" long X 5" wide x 4" tall :)

Friday, March 27, 2009

I had to redeem myself :)

After my faux pas with the cabana project, I decided I better work on and FINISH something - you know - get right back on the horse! ;) I whipped up a couple of make-up bags to go with a tote I made earlier this week - I did learn not to use the really stiff interfacing on them (it makes them very hard to turn right sides out, especially with my flakey hand), but they turned out quite well. I changed the ankle (is that what it's called?) on my Husqvarna to one I found in my stash --- the old one was a low shank one but it slid onto the foot instead of snapping on - not all standard low shank feet would fit on it. I happened to come across a spare ankle in a box and wondered if it would work - it did, and now I can use more standard snap on feet on the Husky! YAY!! That meant I was able to use my regular zipper foot, which is much easier to use than the Husky zipper foot. It's always a good day when you learn something new and make your life just a little bit easier! Here are the new make-up bags with the tote bag that I made earlier this month - I'm very happy with them :)

Eye candy (to me, anyways, lol) - Zoomer kept me company in the studio all morning while I was sewing - here he's holding down Nick's quilt so it doesn't accidentally fall off the table by itself!!! :D

DOH!!!!!

I just spent 45 minutes sewing together the cabanas and palm trees - got the whole row finished and then cut out the sand to go at the bottom of the row. Oh wait - what's that? You see something wrong with the photo? Really? Hmmmmmm what could it be? Let me look closely - nope - I don't see anything wrong. Let me get a magnifying glas ... oh. OH! Now I see it!!! Hmmmmmmmmm something doesn't look right!!! The sand row (cut to the length specified in the pattern) is a foot or more LONGER than the cabana row??!??!!? How could that happen? OH!! Errrrrr. I FORGOT TO PUT SPACERS BETWEEN THE BLOCKS!!! Yep - every other row has spacers between the blocks - I even have the spacers cut out - I just FORGOT TO USE THEM!!!

So now I have to completely rip apart the row (of course, it was sewn using stitch length 1.5) and resew it with the frigging spacers :D

Looks like I have some froggy stitching to do!! Even my cat was less than impressed!

Wednesday, March 25, 2009

Make-up bags and shopping lists :)


3 more make-up bags finished, and since Fabricland's 50% off sale starts tomorrow, I bagged up some projects that are unfinished until I get "stuff" for them - this way I can take the bags to the store with me and match fabrics/trims etc :) There are make-up bags, hotpads and a baby quilt in those 6 bags, lol!

Under the ziplock bags you can see my New England Patriots quilt - that was a gift for my 20 year old for his birthday ... in January *blush*. I've pulled it out to get it finished - it's the #1 UFO on my list right now! #2 is Cabana Bois, but I have until summer to get it finished :D

Tuesday, March 24, 2009

Lemons :)


This morning I used up the last of my lemon fabric and made a couple of make-up bags to go with the tote I made several weeks ago. Both of the bags are decorated with rick rack ... one of them has rick rack on the inside lining as well - that was a design decision - I didn't accidentally sew the trim to the wrong piece - no way - not ME!!! ;)

Monday, March 23, 2009

Dinner is served :D


I paper pieced a couple more kitcheny blocks today, for my "secret" project. Bella knows!!! ;) I got my potato fabric from ebay and appliqued the taters onto a paper pieced block :D The cake block is from Annette Truong. The bowl was from Cups and Saucers from Maaike Bakker :)

Fabricland's 50% off sale starts on Thursday so I can get the other goodies I need to complete this top secret project - just looking at those damn chicken drumsticks makes me laugh, LOLLLLLLLLLLLL.

It's fruity time :)

Another completion - a tote bag and matching make-up bag - both bags are tarted up with rick rack (hard to see in the photo) - the tote has a row of it across the front (near the top), plus the handles each have two rows along the length. The makeup bag has two rows near the top of the front - I've been collecting a nice little stash of r.r. and now I'm having fun using it wherever I can! The tote is 15" X 13" x 4", and is lined with a white/black cherry print. There's a zippered pocket inside the tote. The makeup bag is 6" X 7", lined with the same cherry print.

Just so you know - when you read a tutorial on making make-up bags and they tell you to open the zipper before sewing the bag/lining together, what they REALLY mean is ... OPEN THE ZIPPER BEFORE SEWING THE BAG/LINING TOGETHER! They mean business!! I'm sure most people who sew, know exactly what I mean, LOL! All's well that ends well tho - both bags turned out very nicely :)

Friday, March 20, 2009

My UFO Challenge :)

My friend Bella and I both started a project several years ago that neither of us ended up finishing. I know, I know - who starts something they don't finish - it's unheard of in the quilting world!!! *falls on the floor laffing* :D We decided earlier this week that we're both going to get the project done and ready to hang by summer. The challenge starts today - appropriately - the first day of spring! The project is Beach Cottages Quilt by Piece by Number.


Pictured - the pattern, the top as assembled so far, the blocks I still need to assemble, and the fabrics I have to finish the project with. I have a LOT of work to do yet - yikes!

1. Assemble and add row #4 - the cabanas
2. Add sand strip
3. Assemble and add row #5 - ocean waves
4. Add ocean strip
5. Add inner border
6. Add outer border
7. Add embellishments
8. Layer, baste, quilt, bind, label, add hanger, HANG!

Bella - let's make this interesting - if one of us doesn't have the project completely finished and hung by the first day of summer - June 21 - that person has to send the other one a summery package - a summery fat quarter, a quilty notion or pattern, and some summery embellishments!!! Deal? :)

Monday, March 16, 2009

Just for fun ...

I sewed food :D I have an idea for a project, but I can't complete it until a cute little ebay purchase arrives, and until I get some other parts from Fabricland during their 50% off sale (next week). I dreamed the project up all by my lil ole self - I think it's going to be adorable, if it works out :)

These paper piecing patterns were from Four Twin Sisters -- they have such fun patterns!

Saturday, March 14, 2009

Two more totes :)


I finished up a couple more totes last week --- I had a brain fart and totally forgot to put any pockets in the dark patchwork one, but the lemon bag has a neat pocket - it's two pockets in one - a zippered area and then the regular pocket behind it - I enjoyed doing that, and will do it again (the top picture is a close-up of the zippered pocket) :) Lemons is 14W X 12L X 4D ... patchwork is 15 X 14 x 4. I have such fun making these!!! I have matching makeup bags cut out to go with each one - I got the zippers today @ Fabricland so hopefully I can get them done this weekend. I even found some yellow rick rack to slut up the lemon one :)

Why don't you build me up - build me up - buttercup baby ...


This is what I'm working on this weekend - isn't it pretty? I'm making it in summery Hawaiian type fabric. I'm working on it with a friend who coincidentally picked out fabrics almost exactly like mine - isn't that a hoot? My fabric is on top, Julie's is below - obviously we're both anxious for summer, I'd say!


Here's my finished bag --- uhhhhhhhhhhhhhhhhhhhh it is TINY!!! TINY TINY TINY!!! It's only 7" tall and 11 1/2" wide - as you can see it's not much bigger than my wallet! The pattern designer said to print the pattern "Fit to Printable Area" - I think I need to pretty much double the size to make it work for me - this is too small for anything I would need a tote for. It's such a lovely, feminine pattern, but not too practical for my purposes :)

OOOoooo Julie's bag turned out beautifully - is luv-erly!!!!!!!!

Monday, March 9, 2009

Come on over for tea and ...

Banana Maple Bundt Cake with Walnut Praline Swirl - I spotted this recipe recently and had to try it out. We'll cut into it tonight when the guys get home - if it tastes as good as it smells, it'll be divine!

A few hours later - yep - it was DIVINE!!! Soft, moist, delicious - 5 stars!!!

Saturday, March 7, 2009

When life hands you lemons ...


make a prism makeup bag!!! ;) Here's the tutorial, and here's my first attempt :) I didn't find it as easy to do as all the comments might lead one to believe - I found adding the fabric tabs to the zipper ends was VERY fiddly (and that was the first step, lol) and lining up the pieces was fiddly. The instructions are actually QUITE clear and easy to understand - I read them over a couple of times and knew exactly what I was doing - I just found it a bit difficult to actually DO the steps. The bag looks great but I don't like how bulky the corners are - the bulk is hidden between the outside and the lining fabrics so it's completely invisible - it just feels bulky. I'll try the bag again and be more aggressive when trimming, and will see how it turns out. It really is a damn cute bag, so maybe I'm just being a bit too picky!

One thing I did differently than the instructions, was to use iron on interfacing on the outside fabric - that gave it a bit of body - I'll do that next time as well, as I like the look.

Not bad for a first attempt at a new pattern!

Friday, March 6, 2009

What's purple and floral and pretty?

MY TOTE!! I finished the tote yesterday, and today I used up the last of the floral fabric by making 2 little zippered make-up type bags to go inside :) The tote isn't from a specific pattern - it's size was determined based on the size of the pieces of fabric I had on hand :) It's lined with purple TOT (tone on tone) fabric, and has a little pocket inside made of the floral fabric. The makeup bags are from the delightful Corinne @ Heart of Mary - she did such a great tutorial for these sweet little bags! My goal is to finish 10 of these simple totes as donation items - I think I have 5 done so far :)

Thursday, March 5, 2009

Chicken - it's what's for dinner!

MMMMMMMMmmmmmmmmchicken - baked to perfection! Chicken and Dumpling Bake - great recipe! I want to try her Bacony Chicken and Rice Bake ... and my SIL tried her Baked Chicken with Honey Orange Glaze and pronounced it awesome! Have a poke around the site - I bet you'll find something delicious to try :)

Tuesday, March 3, 2009

Brrrr winter has an icy grip on us!

The cold weather is making me long for spring ... so I made a spring tote :) I have another tote planned ... a FANCY one ... cross your fingers for me :D I'm doing a bit of a "sew along" with a buddy - we're both going to make the tote at the same time. When her schedule permits (she works full-time), we'll get started. I can't wait - I may even go out and buy new fabric for it, even tho I have lots, lol.

LinkWithin

Related Posts with Thumbnails